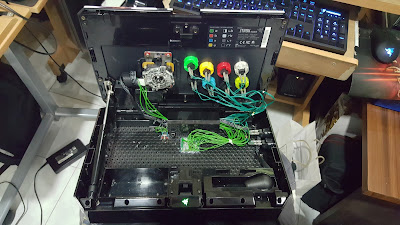
Not only that, the closest thing we can get for a Korean Arcade stick, is a Omni Arcade Stick, which cost 200USD, after conversion and shipping the total of the stick usually sums up to around RM1000.
Not saying Omni Arcade stick is a bad stick, it's a really sexy stick with it's slick steel body finish, but the price though......I'm kinda broke for that luxury.
Adding on, The "Makestick Pro"....yes the name (lol), comes with Sanwa buttons and a Airback Lever, which is like the Holy Grail of Korean sticks, is just too irresistible for a collector to turn down.
My only qualms on the stick is the fact it does not come with a wire compartment, and also the position of the start button......
After getting the stick, I understood why the price of the stick being so low.
First off, the stick looked really old, the artwork looked wet even from outside the plexi (i did not took pictures of the artwork as i threw it away very quickly).
Secondly, after removing the artwork, i noticed the metal plate of the stick was slightly rusted (the previous owner might or might not know, but I'll put my money of the former lol)
I know it looks quite bad from the pictures, but in reality it's not really all that bad. The annoying part would be to make a new plexiglass for this stick as i really did not like the position of the start button AT ALL.
If the condition of the rust was worse, using Vinegar would be a better option, but since the rust wasn't all that bad and deep, sanding it with a fine sandpaper and water pretty much took all the rust out of the metal panel.
Your generic Car spray paint, for additional Coating so it would not rust easily again.
Hanging the panel to dry after spraying, the drying process does not take really long, but just as a precaution i would keep it there for a few hours (since i don't have any plans for the stick anyway)
After drying, the metal panel look just as good as new, now i can only wait till my custom plexi to arrive and i can install my extra brook Fighting Board in go without any extra hassle.
Effort to take the rust off 3/10


